The best way to setup your Pi for the WoT is to follow the step by step instructions of Chapter 4. However, should you want to take the fast route we baked a Pi Raspbian image with all you need to get started.
Prerequisites
You’ll need a 16 GB SD card, preferably a fast one and a Pi 3 (the image works with other Pi as well but you’ll have to reinstall Node.js as the CPU architecture differs, see Chapter 4 for how to do this).
What’s in the image?
The image is packed with tools to build the WoT! In particular:
- Raspbian Jessie Lite (Linux Operating System)
- Node 4.8 (Node 4.X is required for the code, later versions currently do not work!)
- Node-RED 0.16.2 (with the EVRYTHNG Node)
- Webofthings.js
- All the code examples from the book
Installing the WoT Pi image
Start by downloading the Pi image via the HTTPS URL or Torrent URL (faster). Note that this might take a while as the image is about 1.2GB!
Current version: 1.0.1
SHA256 Hash: 97a918adb11b22e752a09b0bfd96ee14975dfdc94162d1ca14232ea9b55657cf
MD5 Hash: e1fd95cb485e4f74667c30a2754ff394
Copying the image
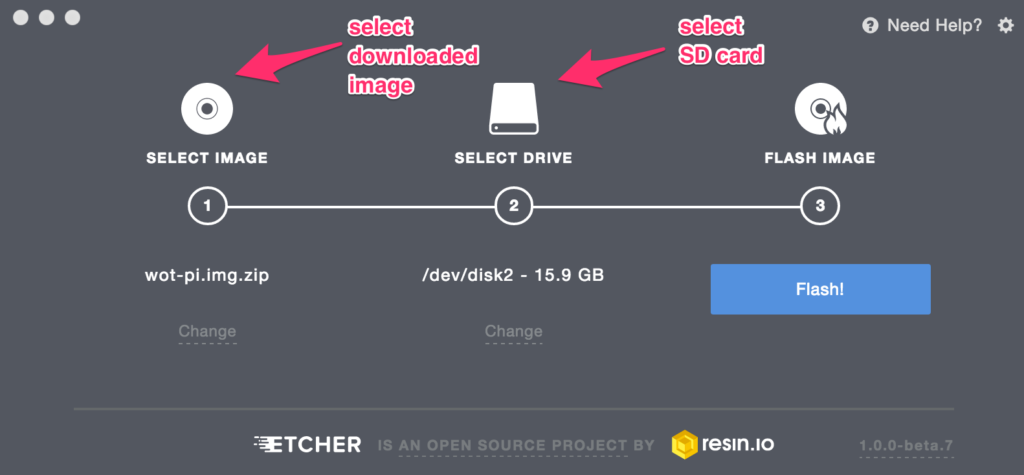
Next, you’ll need to write the image to the SD card. The easiest way is to use Etcher, a great tool by resin.io to burn SD cards for embedded devices. After installing Etcher simply select the image file on your computer and write it to a formatted SD card.
Alternatively you may want to try:
- ApplePi Baker for Mac OSx, or via command line tools
- Or, on Windows, Win32 Disk Manager
- For Linux there are several ways and some distributions such as Ubuntu can do this out of the box, check the tutorials here
Starting the Pi
Insert the SD card into the slot of your Pi, connect an Ethernet cable to your router and power the Pi via USB. After a little while the Pi should boot up and should be accessible via SSH:
ssh pi@raspberrypi.local
the default password is raspberry, do not forget to change it! The rest of the setup is explained in chapter 4.